res/layout/activity_main.xml
<?xml version="1.0" encoding="utf-8"?>
<android.support.constraint.ConstraintLayout xmlns:android="http://schemas.android.com/apk/res/android"
    xmlns:app="http://schemas.android.com/apk/res-auto"
    xmlns:tools="http://schemas.android.com/tools"
    android:layout_width="match_parent"
    android:layout_height="match_parent"
    tools:context="com.evgenii.sixbouncingbuttons.MainActivity">

    <Button
        android:id="@+id/button"
        android:layout_width="92dp"
        android:layout_height="92dp"
        android:onClick="didTapButton"
        android:background="#FFA400"
        app:layout_constraintBottom_toBottomOf="parent"
        app:layout_constraintLeft_toLeftOf="parent"
        app:layout_constraintRight_toRightOf="parent"
        app:layout_constraintTop_toTopOf="parent" />

</android.support.constraint.ConstraintLayout>
2) انشاء ملف animation
res/anim/bounce.xml
- انقر بزر الماوس الأيمن على المجلد.
- Select New / Android resource file.
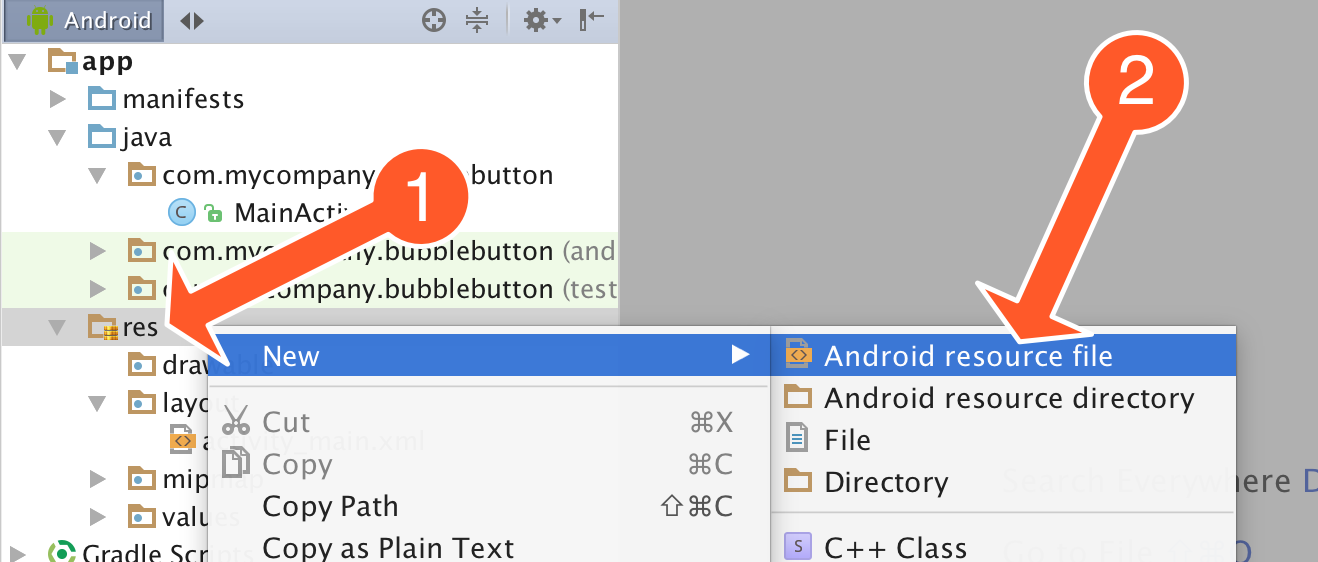
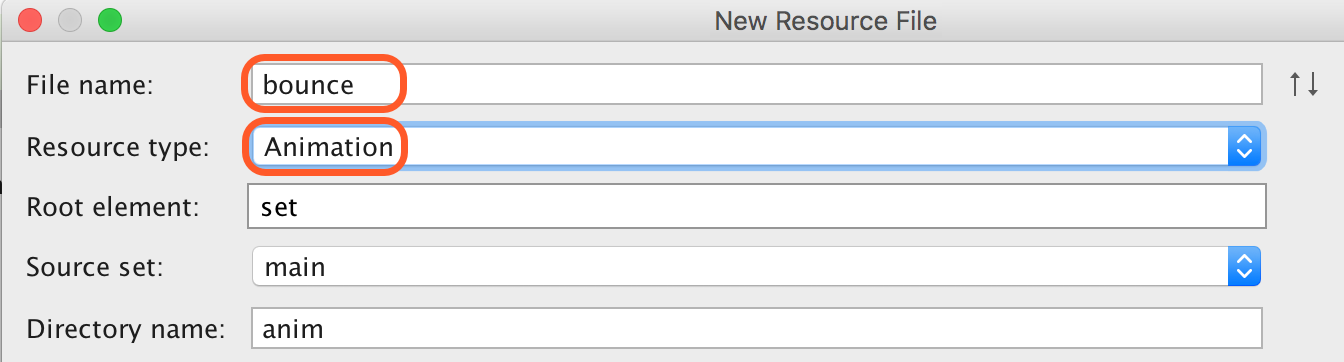
- bounce اسم الملف
- اختر النوع Animation
- سيتم التغيير الى anim.
التالي, فتح الملف res/anim/bounce.xml
انسخ الكود
<?xml version="1.0" encoding="utf-8"?>
<set xmlns:android="http://schemas.android.com/apk/res/android" >

    <scale
        android:duration="2000"
        android:fromXScale="0.3"
        android:toXScale="1.0"
        android:fromYScale="0.3"
        android:toYScale="1.0"
        android:pivotX="50%"
        android:pivotY="50%" />
</set>
هذه التعليمات البرمجية animation
تغيير حجم وطريقة العرض 30% 100%
3)عند الضغط على الزر
activity Java file.
public void didTapButton(View view) {
    Button button = (Button)findViewById(R.id.button);
    final Animation myAnim = AnimationUtils.loadAnimation(this, R.anim.bounce);
    button.startAnimation(myAnim);
}


ليست هناك تعليقات:
إرسال تعليق